 English
Views: 0 Author: Site Editor Publish Time: 2025-12-30 Origin: Site


In small indoor studios (such as corporate live streaming rooms, knowledge sharing rooms, and small interview rooms), lighting design does not require piling up complex equipment. In scenarios with limited space and controllable budgets, the precise deployment of front light and side light often achieves a "low cost, high quality" effect—satisfying clear subject presentation while avoiding image flattening through light and shadow layers. This article focuses on these two core light positions, breaking down the design logic and practical techniques for small studio lighting.
")
The core demand of small studios is to "highlight the subject and keep the image clean," and the combination of front light and side light precisely addresses this pain point: front light is responsible for "illuminating the subject," while side light shapes "three-dimensionality." Together, they build a basic yet high-quality visual framework.
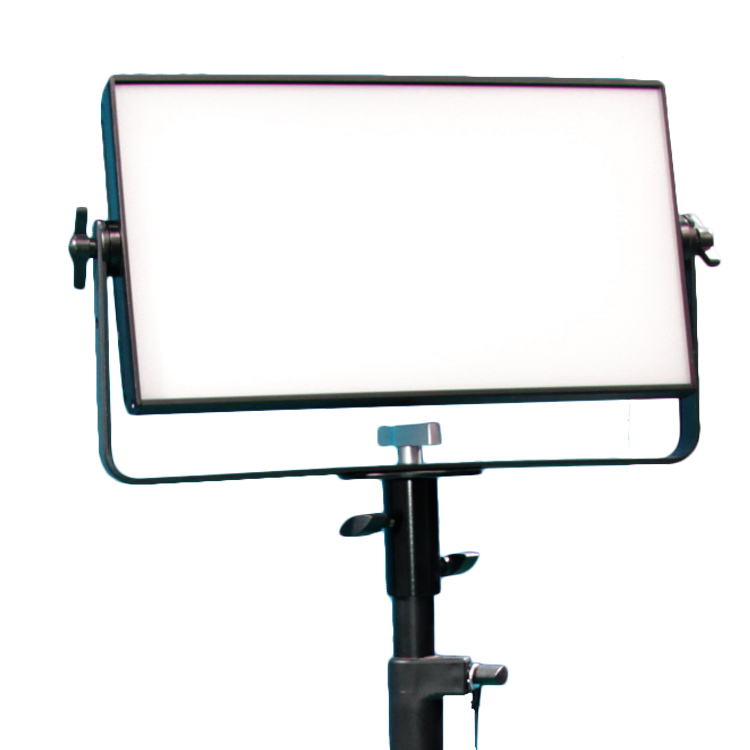
Front light is the "top priority" in studio lighting, directly determining the facial clarity and skin tone authenticity of hosts and guests. Its core role is to evenly distribute light, eliminating shadows in eye sockets, under the nose, etc., while restoring skin texture and clothing colors through high color rendering.
Key Indicators: Color Rendering Index (CRI) ≥90 (preferably Ra≥95), adjustable color temperature of 3200K-5600K (adapting to warm, approachable or cool, professional feels), brightness uniformity >85% (avoiding uneven facial lighting).
Pitfall Avoidance Tips: Avoid placing the light source too low (prone to "ghosting") or too high (exacerbating eye socket shadows). It is recommended that the fixture height be level with the subject’s line of sight or slightly higher by 15°-20°, with a projection angle of around 45°.
Side light is a "cost-effective magic tool" for small studios—without additional background light, supplemental lighting from the subject’s side breaks the flatness from front light, outlines shoulder-neck and head contours, and makes the figure "stand out" from the background.
Lighting Logic: Form a 90°-120° angle with the front light (single-sided or bilateral), with a beam width slightly narrower than the subject’s shoulder width. Brightness should be about 1/3 to 1/2 of the front light (avoiding overshadowing).
Advanced Tips: For round-faced subjects, raise the side light to cheekbone height; for long-faced subjects, lower it slightly to the jawline to adjust the visual proportion via light and shadow.
"Less is more" is the golden rule for small studio lighting: front light aims for "even coverage" (avoiding overlapping light spots from multiple lamps), while side light follows the principle of "single-lamp outlining" (using fixtures of the same model for bilateral lighting to ensure consistency). Unify color temperature strictly (error <200K) and keep the brightness difference within 2:1.
")
Front Light First Choice: Profile Lights
With adjustable beam angles, high color rendering, and precise light area control, profile lights have become the "precise choice" for front light in small studios. Compared to panel lights, their advantages include: zoom lenses (e.g., switching between 19°, 26°, and 36° beam angles) adapt to different facial contours, avoiding overly diffuse or concentrated light spots; with a diffuser, uniformity reaches 88%-92%, and CRI generally ≥95 (e.g., models with Osram LED light sources), truly restoring skin tones and clothing details.
Selection Points: Power: 200W-350W (sufficient for small spaces); with DMX dimming/focusing functions (flexibly adapting to subjects of different heights); prioritize models with a "soft light mode" (one-click switch between hard and soft light). For limited budgets, domestic entry-level models (e.g., Colorful, Haoyang basic series) offer higher cost-effectiveness.
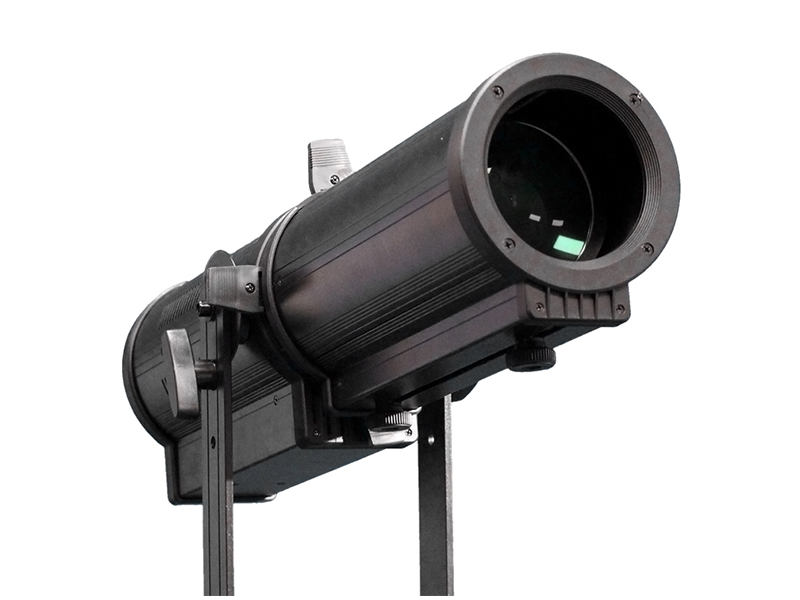
Side Light Preferred: Spotlights
Spotlights, with high brightness, narrow beams, and strong directionality, are the "sharp tool" for outlining contours with side light. Concentrated beams (common 10°-15° beam angles) precisely cover the shoulder-neck to the side edge of the head, avoiding stray light interfering with the background. Paired with adjustable focusing, the light area can be narrowed according to the subject’s shoulder width, forming a clear three-dimensional edge light at ~1/3 the front light’s brightness.
Selection Points: Power: 150W-250W (to avoid overexposure); choose models with "linear dimming" (natural brightness gradient); color temperature strictly consistent with the front light (error <150K). For extremely small spaces (≤10㎡), small LED spotlights (e.g., 100W portable models) can save floor space via bracket suspension.
Auxiliary Tools: Essential barn doors (to prevent spotlight spill light into the lens); lux meter (measured front light brightness: 800-1200lux, side light: 400-600lux); color temperature card (color correction reference).
Set Front Light (Profile Light): Place the profile light 2.5-3 meters directly in front of the subject, with height level with the subject’s glabella and a 45° projection angle. First roughly adjust with a 26° beam angle, observing facial light coverage (goal: even lighting from forehead to chin, no dark eye sockets). Then narrow the light area to 5cm outside the facial contour via the focus knob. Finally, turn on soft light mode and calibrate brightness to ~1000lux with a lux meter.
Add Side Light (Spotlight): Position the spotlight 1.8-2.2 meters to the left (or right) of the subject, projecting at 75°-80° (≈100° angle with the front light). Adjust the beam angle to 12°, ensuring the light edge just covers the outer shoulder (use barn doors to block excess light). Set brightness to 50% of the front light (~500lux), checking for clear contours (no "half-face shadow," slight bright edge on shoulder-neck lines).
Calibrate Color Temperature and Light Ratio: Place a color temperature card under both lights, take photos for comparison (or use the phone’s "white balance lock"). Ensure color temperatures match (e.g., both set to 4500K for a professional feel). Recheck the brightness ratio (front: side ≈2:1) with a lux meter, fine-tuning the spotlight dimmer to meet the standard.
Take a corporate "executive interview" small studio (15㎡ area, 2.8m ceiling height) as an example:
Equipment Configuration: Front light: 2 units of 3000W LED profile lights; side light: 2 units of 200W LED spotlights; no background light or special effects.
Effect Presentation:
Subject’s facial brightness: 1050lux, uniformity 90%, skin tone restoration error <2% (no visible color deviation), eye socket shadows eliminated.
After spotlight contouring, the three-dimensionality score (professional evaluation) rose from 4.2 (strong flatness) to 9.1, with background separation increased by 40%.
Recording cost reduced by 55% vs. traditional "five-light layout"; post-production color grading time cut by 35% (due to unified color temperature and stable light ratio).

In small indoor studio lighting design, "precision" far outweighs "complexity." The front light (profile light) lays a clear foundation, and the side light (spotlight) endows three-dimensionality. Together, they meet over 90% of scene needs (interviews, presentations, light variety shows). As LED fixtures become smaller and smarter (e.g., one-click APP adjustments), this "simple and efficient" logic will grow more popular—remember: good visuals rely not on many lights, but on accurate light positions and precise equipment.