 English
Views: 0 Author: Site Editor Publish Time: 2025-07-11 Origin: Site


Studio lighting can make or break a portrait. Do you struggle to capture the perfect lighting? The right lighting is essential for creating striking, professional-quality portraits.
In this guide, we’ll explore the different types of studio lighting, essential gear, and key techniques you’ll need to master to elevate your portrait photography. From continuous lighting to strobes, you'll learn everything you need to get started.
Studio lighting refers to the controlled use of artificial light in photography. Unlike natural light, which is unpredictable and dependent on time of day and weather, studio lighting offers precision and consistency.
The role of studio lighting in portrait photography is to shape and define the subject. By positioning lights at various angles and intensities, photographers can highlight specific features, create dramatic shadows, or soften the overall look. This control is essential for crafting high-quality, professional portraits.
Studio lighting stands out from natural light due to its flexibility. You can adjust the light's power, direction, and quality to match the desired effect. Whether you need soft, diffused light or harsh, contrast-heavy shadows, studio lighting lets you have full command over your images. This makes it ideal for studio portraiture, where consistency and precision are key.
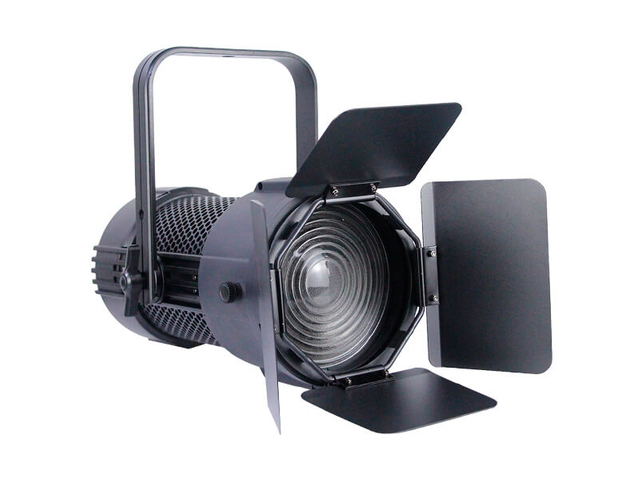
Continuous lighting provides a constant light source, making it easier for beginners to see how the light affects the subject in real-time. This allows you to adjust settings on the fly and ensures that the lighting is consistent throughout the session.
There are several types of continuous lighting:
LED lights are energy-efficient and produce little heat.
Tungsten lights provide a warm, natural light but can get very hot.
Fluorescent lights are also energy-efficient, though they often produce a cooler light.
For beginners, continuous lighting is ideal because it lets you preview the results immediately, giving you the confidence to adjust as needed without waiting for a flash to fire.
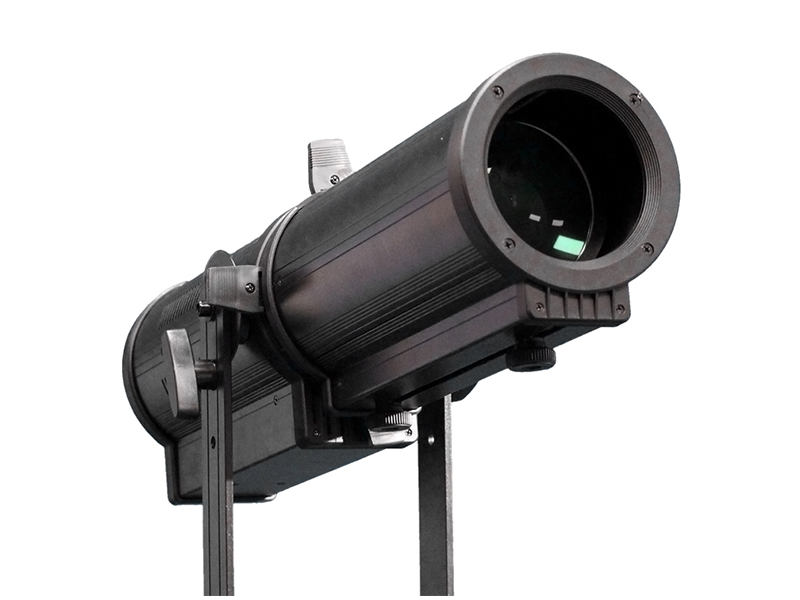
Strobe lighting, commonly used in professional portrait photography, involves a burst of light that illuminates the subject for a fraction of a second. It's known for producing bright, sharp images and is perfect for dramatic, high-contrast portraits.
Strobe lighting differs from continuous lighting in that it doesn't provide a constant light source. Instead, it fires only when triggered by the camera. This allows photographers to control exposure in ways continuous lighting can't. Strobes are typically more powerful, which makes them ideal for achieving striking, high-impact portraits.
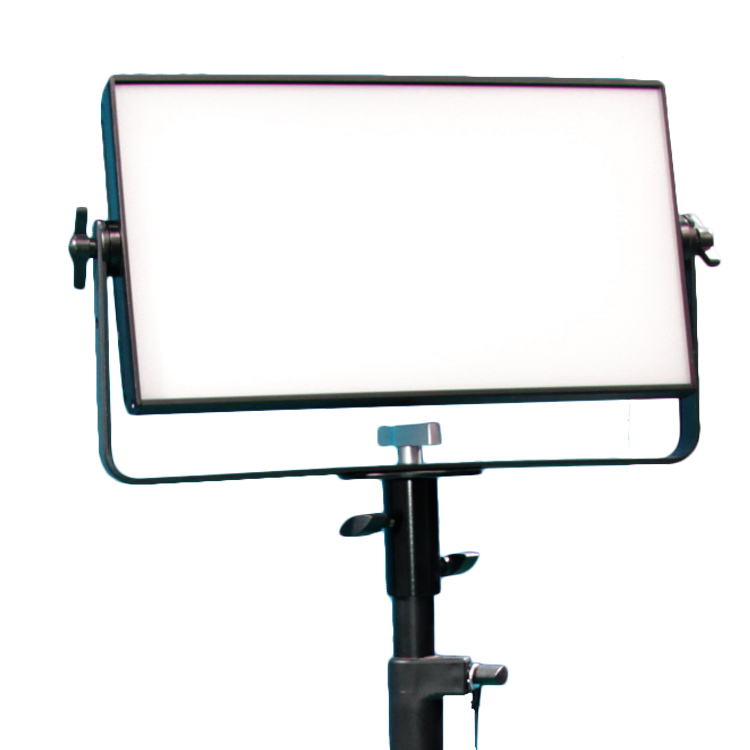
LED lighting has become a favorite in photography due to its energy efficiency, long lifespan, and precise control over color temperature. It’s ideal for both photography and videography, offering consistent lighting without the heat associated with other light sources.
LED lights are especially useful in portrait photography for their ability to provide soft, even light. They are compact, lightweight, and can be adjusted to match the color temperature of your subject or surroundings. LED lighting is perfect when you need to control the ambiance and mood of your shot, as you can fine-tune the lighting without much effort.
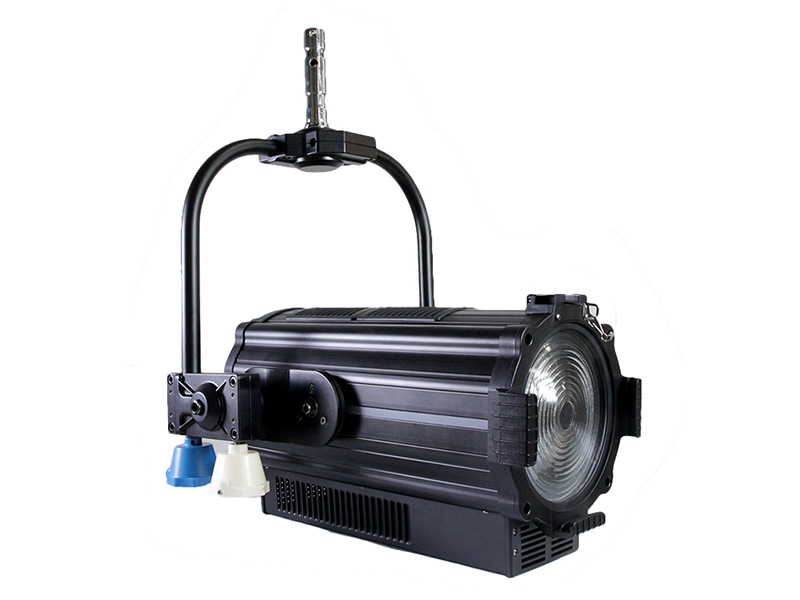
The key light is the primary light source in portrait photography. It defines the overall exposure and creates the base lighting for the shot. Its placement has a significant impact on how the subject appears, so positioning is crucial.
To achieve flattering lighting, position the key light at a 45-degree angle from your subject, slightly above their eye level. This creates natural-looking shadows that add depth and dimension to the face. For softer, more even lighting, lower the angle or move the light closer.
Adjusting the intensity of the key light allows you to change the mood of the portrait. A higher intensity gives a bright, vibrant look, while a lower intensity results in softer, more dramatic lighting.
Fill light softens the shadows created by the key light, ensuring that details in the darker areas are visible. It doesn’t compete with the key light; rather, it fills in the gaps, balancing the overall exposure.
Position the fill light on the opposite side of the key light, usually at a lower intensity. This prevents harsh shadows and keeps the lighting soft and natural.
There’s a distinct difference between soft and hard fill lighting. Soft fill light produces gentle shadows and smooth transitions, while hard fill light can create sharp, defined shadows that add contrast and drama.
Backlight is positioned behind the subject to create separation from the background. This lighting adds a rim of light around the subject, highlighting the contours and adding depth to the portrait.
To use backlight effectively, place it slightly above and behind the subject. This positioning creates a halo effect around the subject's outline. It’s especially useful for defining the edges of the subject, making them stand out against a busy background.
Backlighting not only helps create a professional look but also emphasizes features like hair and shoulders, enhancing the overall composition of the portrait.

The 45-degree lighting setup is one of the most popular and versatile configurations for portrait photography. In this setup, the key light is positioned at a 45-degree angle to the subject and slightly above their eye level.
To set it up:
Place the key light at a 45-degree angle from the subject's face, at about eye level or higher.
Ensure the light is aimed at the subject’s face, creating soft shadows.
If using a fill light, position it opposite the key light to balance out the shadows without overpowering the subject.
This setup works perfectly for standard portrait shots, providing even and natural lighting. It highlights the subject’s features while maintaining a flattering balance of light and shadow.
Rembrandt lighting is known for its dramatic, moody effect. The key light is positioned at a 45-degree angle above and to the side of the subject. This creates a distinct triangle of light on the opposite cheek.
To achieve Rembrandt lighting:
Position the key light at a 45-degree angle, slightly above the subject’s eye level.
Adjust the light to create the signature triangle of light on the opposite cheek.
To refine the look, use a reflector on the opposite side to soften shadows and maintain detail.
This setup is perfect for portraits where you want a more serious or dramatic mood, and you can adjust it to suit different face shapes or desired levels of contrast.
Butterfly lighting is a common setup for beauty and fashion portraits, known for its flattering look. It creates even, soft lighting on the subject’s face, with subtle shadows under the nose and chin.
To create butterfly lighting:
Place the key light directly in front of the subject, slightly above eye level.
Adjust the light to create a butterfly-shaped shadow under the subject’s nose.
If needed, use a fill light or reflector to soften shadows and reduce contrast.
Butterfly lighting is great for highlighting the face, especially for beauty shots, but you can adjust the intensity to create more or less contrast depending on the desired effect.
Split lighting is known for its edgy, high-contrast look. It splits the subject’s face in half, with one side brightly lit and the other in shadow. This creates a bold, dramatic effect.
To set up split lighting:
Position the key light to the side of the subject at a 90-degree angle.
Aim the light directly at one side of the subject’s face.
Keep the opposite side in shadow for a high-contrast effect.
Split lighting works well for dramatic portraits, adding mystery and intensity to the image. Experiment with the model’s positioning to perfect the light and shadows for the desired effect.

Soft light and hard light are two fundamental types of lighting that dramatically affect portrait photography.
Soft light creates gentle shadows and smooth transitions, making it ideal for portraits. It’s flattering because it reduces harsh details, softens skin textures, and minimizes imperfections. This makes soft light perfect for beauty or fashion shots where smooth, even lighting is desired.
On the other hand, hard light produces sharp, well-defined shadows. It’s used for high-contrast portraits, creating a dramatic and edgy look. This type of light emphasizes texture and detail, making it ideal for creating strong, bold images where contrast plays a key role.
Diffusion refers to the process of softening light by spreading it over a wider area. This technique reduces the intensity of light and softens the shadows, which can make a portrait look more flattering.
Common diffusing materials include:
Softboxes, which create a controlled, even light.
Umbrellas, often used to create a broader spread of light.
For beginners, choosing the right diffusion material depends on the desired effect. Softboxes provide more controlled diffusion, perfect for softer, more even lighting. Umbrellas are simpler and can create a larger, softer light for general portrait use. Experimenting with different diffusion materials will help you understand how light quality can change the mood of your portraits.
In studio lighting, exposure is determined by three key settings: shutter speed, aperture, and ISO. These settings work together to ensure your portrait is neither too dark nor too bright.
Shutter speed controls how long the camera's sensor is exposed to light. A faster shutter speed reduces light exposure, while a slower one increases it.
Aperture adjusts the size of the lens opening. A larger aperture (smaller f-number) lets in more light, while a smaller aperture (larger f-number) lets in less.
ISO controls the sensor's sensitivity to light. A higher ISO allows for better performance in low light but can introduce noise, while a lower ISO keeps the image clean but may require more light.
For beginners, adjusting these settings can be tricky. Start with the aperture and shutter speed. Set the aperture to the desired depth of field and adjust the shutter speed to balance the exposure. Then, tweak the ISO to avoid overexposure or underexposure.
A good rule of thumb is to keep the ISO as low as possible to maintain image quality. Use the shutter speed and aperture to control light intensity, and adjust ISO only when necessary.
The placement of your lights can drastically change the mood of your portrait. A light placed in different positions or angles can create varying effects.
For example, placing the light higher and slightly to the side of your subject can create softer shadows, giving the image a natural, flattering look. Lower light placement can create more dramatic, intense shadows, perfect for creating a moody or mysterious effect.
Shadows and light direction also play an important role in emotional impact. A direct, harsh light can create a tense, high-contrast look, while soft, diffused light creates a calm, gentle atmosphere. By adjusting the light's direction and angle, you can easily change the mood of the shot. Experimenting with these factors will help you develop a unique style and control the emotional feel of your portraits.
Improper exposure settings are a common mistake when using studio lighting. Overexposure results in bright, washed-out images, while underexposure leads to dark, muddy photos. Both can ruin your portrait, making it difficult to recover in post-processing.
To avoid this, start by setting your camera to manual mode. Adjust your aperture and shutter speed based on the available light, then fine-tune your ISO. Keep the ISO as low as possible to reduce noise, and balance the other settings to ensure the right exposure. Always check your histogram to see if the image is properly exposed before taking the shot.
Light positioning is crucial in creating flattering portraits. Placing the light in the wrong spot can result in unflattering shadows or uneven lighting across the subject's face.
To avoid this mistake, experiment with different light positions. For soft, natural shadows, place the light at a 45-degree angle to the subject. If you want more dramatic lighting, try placing the light higher or lower. Don't be afraid to adjust the distance between the subject and light to fine-tune the shadows. Keep testing until you get the effect you want.
Many photographers focus only on the subject’s lighting but forget about the background. An unlit or poorly lit background can create distractions, taking away from the subject’s presence.
To avoid this, make sure to light the background separately from the subject. A simple background light can add depth and separate the subject from the backdrop. Use a soft, diffused light for a clean look or a more focused light to create texture. Keep the background simple and balanced to maintain the subject as the focal point of the shot.
Mastering studio lighting is essential for creating high-quality portrait photography. Experimenting with different lighting setups and techniques will help you develop your unique style. Remember, practice and patience are key to achieving stunning results. Keep learning and refining your skills, and soon you’ll see your portraits transform.
A: Yes, beginners can achieve great results using just one light and a reflector. A simple setup like a 45-degree key light with a fill light is a great starting point.
A: Continuous lighting is often recommended for beginners due to its ease of use and real-time feedback. LED lights are also a great choice for their efficiency and control.
A: Using a soft light modifier like a softbox or umbrella can help soften shadows. Adjusting the distance of the light from the subject also plays a significant role.
A: You can control color temperature by adjusting the white balance on your camera or using color gels on your lights. LEDs also allow you to manually set the color temperature to match your needs.